In case you want to know how to change display refresh rate, then you probably are trying to either keep your screen smoother, to play the game better, or to remove flicker. The refresh rate is the number of times your screen is able to refresh per second, and it can have a tremendous impact on the experience of animation, videos and games. If it is Windows, macOS, or even GPU control panels, this guide will describe each approach step by step. It also contains some advice on troubleshooting missing refresh rates, and what hardware you will need to have.
Table of Contents
What Is Refresh Rate
Display refresh rate, in Hertz (Hz), is the number of times that the image is changed every second. One refreshing rate is 60Hz or 60 times a second. Modern monitors and laptops do however have 75Hz, 120Hz, 144Hz, 165Hz and 240Hz or 360Hz displays.
Why higher refresh rates matter
More refreshes result in movement that is way smoother. To gamers, this can be the difference between a responsive experience and one that is slow or blurred. But not only gaming high Hz. The daily activities of scrolling, browsing, and writing with a stylus are also much smoother. Reduced refresh rates, however, use less energy.
This is the reason why there are lots of laptops that give you the option of using a high and low refresh rate based on your demands. Certain Windows devices support Dynamic Refresh Rate (DRR), an automatic mode shifting between high and low refresh rates to save battery without impacting performance.
Understanding Refresh Rate vs Frame Rate vs VRR
There are three terms associated, but distinct, that you should be familiar with before modifying anything, and that are refresh rate, frame rate, and VRR.
Refresh Rate
This is what your display can do. A 144Hz display is capable of changing its display 144 times every second. Reaching this limit requires overclocking of your monitor which does not work consistently.
Frame Rate (FPS)
This is generated by your processor or your graphics card. Although your monitor may have a 144Hz display, with a 60 FPS GPU, you will not be able to see smoother images.
VRR – Variable Refresh Rate
VRR aligns your monitor with your GPUs frame rate. This eliminates the tearing of screens and enhances smoothness. Under VRR, there are technologies such as G-Sync, FreeSync, and Adaptive Sync.
How to Check Your Current Refresh Rate
The first thing before making any changes is to ensure that you have checked the refresh rate of the device that you are currently using.
Checking Refresh Rate on Windows
To check your current refresh rate, open the Settings, choose System, then Display, and then Advanced display. The resolution, refresh rate, bit depth, and the GPU will be provided here. Many users also Adjust Display Brightness in this same menu to improve visibility while calibrating refresh rate settings. When you have more than one monitor, it is important to check the refresh rate and make sure you have selected the appropriate monitor.
Checking Refresh Rate on macOS
The refresh rate of Mac users is located in the System Settings. Once the Displays panel is opened, you must select the display you wish to configure, whether internal or external and the refresh rate options available in the external display will appear. The refresh rate is also auto-adjustable on certain MacBooks, particularly ProMotion models, depending on the content.
How to Change Refresh Rate on Windows
Once you know where to find it, it is easy to change the refresh rate on windows.
Steps to change refresh rate
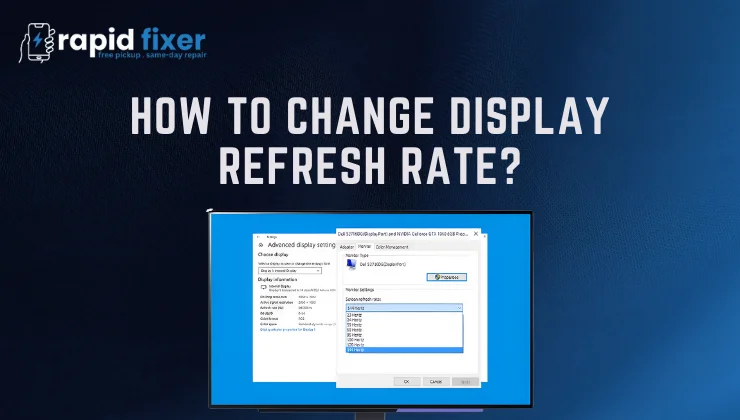
Click on the start menu and go to settings. Select System and Display. On the screen, scroll to the point of Advanced display settings. When connected to multiple monitors, ensure that you choose the right one on the dropdown list at the top.
After choosing it, you will be presented with a tab named Choose a refresh rate. Click the dropdown and choose the rate at which you wish to run, i.e. 60Hz, 120Hz, 144Hz, or 240Hz. Windows will implement it and the display can briefly flicker as soon as you choose a new value.
Windows Dynamic Refresh Rate (DRR)
DRR is enabled on modern windows machines and it intelligently drops to low refresh rate and back to high refresh rate as needed. Windows can provide smooth animation when it is enabled and save battery life. DRR is only compatible with displays which support VRR and have a minimum 120Hz capability.
How to Change Refresh Rate on macOS
Apple devices have a clean and easy user interface to handle refresh rates.
Steps for macOS
Open System Settings and select Displays. A list of linked displays will be presented. Choose the one that you want to set up. During the display settings, there is a Refresh Rate choice. Click it to view the refresh rates available. Select the one you require and it will be implemented instantly by MacOS.
Other models of MacBooks e.g. ProMotion technology (120Hz displays) have the ability to dynamically change the refresh rate depending on your activity. In such models, unless it was quite deliberate on your part, macOS will do it automatically, even though you can set it to a fixed rate.
How to Change Refresh Rate Using NVIDIA, AMD, and Intel GPU Panels
Windows or macOS might fail to list all refresh rate options in some situations. Here is where the use of the GPU control panels comes in.
Changing Refresh Rate via NVIDIA Control Panel
Click on the desktop with your right-hand mouse and launch the NVIDIA Control Panel. Go to Display and choose Change Resolution. The refresh rate settings are on the right. Select your desired refresh rate and press Apply.
Changing Refresh Rate via AMD Radeon Software
Open AMD Radeon Software and select the Display tab. Here you are able to adjust the refresh rate or come up with custom resolutions in case your monitor can do so. Once you have selected the rate you want, implement the changes.
Changing Refresh Rate via Intel Graphics Command Center
Open the Intel Graphics Command center and select the Display panel. Get the refresh rate: Click on your monitor and select a new refresh rate in the list. Confirm your changes.
Essential Hardware Requirements Before Changing Refresh Rate
The refresh rate of a monitor is not limited to its software settings. The hardware configuration has to be in the position to support the desired refresh rate.
Monitor Capability
The physical capacity of your monitor is the first requirement. When your monitor is 60Hz-rated, it cannot be changed to 120Hz or 144Hz without an overclocking mode available. Do not just alter the refresh rate without first confirming what the manufacturer specifies.
Cable and Port Requirements
Not every cable supports every refresh rate. To take a recent example, a high-refresh-rate monitor may be connected with an earlier HDMI cable and then the user wonders why it shows only 60Hz in the settings.
HDMI Requirements
Earlier HDMI cables tend to be limited to 60Hz, particularly at higher resolutions. HDMI 2.0 or HDMI 2.1 might be required to support higher rates such as 120Hz or 144Hz at 1440p or 4K. These versions have increased bandwidth and can transmit more data between the monitor and the GPU.
DisplayPort Requirements
DisplayPort cables tend to be more reliable with higher refresh rates. DisplayPort 1.4 can support 144Hz at 1440p and even 4K at 120Hz using Display Stream Compression (DSC). DisplayPort 2.1 has even more resolutions and refresh rates in next-generation monitors.
GPU Compatibility
The refresh rate should also be supported by your graphics card. Older GPUs might fail to generate high refresh rates at specific resolutions. Older laptops usually have integrated graphics that have limited refresh rates. Always verify the specifications of your GPU.
Monitor OSD Settings
The On-Screen Display (OSD) that is built into the monitor frequently has refresh rate options. Others include a switch between 144Hz / 165Hz, an overclock mode, a VRR switch, or HDMI / Displayport version compatibility. In the event that the refresh rate of your desire is not showing, go to the OSD of the monitor and make sure these are turned.
Troubleshooting Missing or Unsupported Refresh Rates
You have been used to noticing that your desired refresh rate is not available in your settings. The causes tend to be straightforward when you know what to look at.
Incorrect Cable or Port
The most widespread reason is a cable that cannot sustain the bandwidth necessary to high refresh rates. When you use HDMI, be sure that it is HDMI 2.0 or 2.1 based on your resolution. Preferably, use DisplayPort, which is typically more compatible with gaming monitors.
Also, make sure that your cable is inserted into the right port on your GPU and on your monitor. Other monitors have several HDMI ports with varying abilities. The same goes with DisplayPort versions.
Driver Issues
In case your Gpu drivers are not updated, then your operating system might fail to recognize available refresh rates. This issue can be immediately resolved by updating your drivers using NVIDIA GeForce Experience, AMD Adrenalin or Intel Graphics Command Center.
Monitor Configuration
Other monitors make you enter the port into a certain version manually. As an example, HDMI ports may include a 1.4/2.0 switch. When higher refresh rates are not programmed appropriately, higher refresh rates will not be evident.
Moreover, some monitors only accept high refresh rates at certain resolutions. To unlock the maximum refresh rate, you might have to choose the native resolution of the monitor.
Laptop Refresh Rate Limitations
Depending on the kind of port the device provides, laptops sometimes support minimal external display. USB-C ports, such as those on computers, can be limited to 60Hz at 4K unless they incorporate Thunderbolt. It is important to make sure you always consult the technical documentation of your laptop to understand what refresh rates are supported by the device using HDMI and USB-C.
Creating Custom Refresh Rates (Advanced Users Only)
GPU control panels enable the user to create custom refresh rates, especially the advanced users who wish to take their monitors past factory specifications.
NVIDIA Custom Resolution Setup
Under the NVIDIA Control Panel, go to Change Resolution and click Customize. You have the option of making your own resolution, and adjusting the refresh rate in small steps. Unless the monitor rejects the new rate, it will show. Otherwise you can expect flickering or black screens.
AMD Custom Timing Setup
There is also the Custom Resolutions feature in AMD Radeon Software. A higher refresh rate, in this instance, should be approached carefully. Not every monitor works well with overclocking.
Warnings Before Overclocking
Other refresh rates may be unstable, produce artifacts or even harm the monitor in the long run. Do this only when you have a complete understanding of the risks and are in a position to undo changes in case the display acts in a certain way.
Choosing the Best Refresh Rate for Different Uses
The type of refresh rate that you choose will depend on your usage.
Gaming
Gamers must always select the maximum refresh rate that is supported by both the monitor and the graphic card. The faster the refresh rate the less motion blur and quicker responses. The monitor can also be paired with VRR technologies, like FreeSync or G-Sync, and can make the experience even smoother.
Everyday Use and Browsing
A 60Hz refresh rate is generally adequate when you are simply browsing or typing documents. During refresh rate, it is possible to reduce the refresh rate by lowering the battery consumption to a great extent on laptops.
Creative Work and Content Editing
To video editors, animators, and designers, the refresh rate does not matter as much as the color accuracy. It is advised to use the native refresh rate of your monitor. In other instances, disabling VRR offers more predictable color behavior.
Conclusion
Understanding how to change display refresh rate can do wonders to enhance your overall experience on the screen be it in gaming, browsing, editing, or in an attempt to correct flickering or lags. It is easy on both Windows and macOS, and knowing what hardware you need, makes sure your monitor works optimally. When a refresh rate does not show, the answer is most often to update the drivers, to use the right cable or to change the settings on the monitor.
Always make it a point to have the maximum refresh rate of your machine to achieve the best performance. And when it comes to battery life, or heat, one can always reduce.
FAQs About How to Change Display Refresh Rate?
How do I change display refresh rate on Windows?
To adjust the refresh rate, use the settings, choose System, Display, and Advanced display. At this point, then select your monitor and your preferred refresh rate.
Why is my monitor stuck at 60Hz?
This normally occurs because of the incompatible cable, wrong monitor settings, outdated drivers, or the wrong display port. After these problems are resolved, the higher refresh rates normally show.
Is a higher refresh rate better for gaming?
Yes. The faster the refresh rate, the more butter smooth the motion becomes, the less input lag will occur and the more responsive the gaming experience will be.
Can changing the refresh rate damage my display?
Adjustment of refresh rates within acceptable ranges will not harm your display. Problems arise when the custom refresh rates are not supported.
What cable do I need for 120Hz or 144Hz?
High-refresh-rate 4K or 1440p displays require HDMI 2.0 or HDMI 2.1. DisplayPort 1.4 or DisplayPort 2.1 are higher refresh rates that are recommended.